Infinity Nikki Expedition Handbook Guide: All 40 Photo Locations and How to Unlock Them
Complete the Infinity Nikki Expedition Handbook scavenger hunt to earn Upgrade Packs and enhance your in-game photography.
The camera in Infinity Nikki isn’t just a fancy toy – it’s practically your best friend in Miraland. With its ever-growing collection of poses, filters, and lighting options, snapping the perfect shot feels endlessly rewarding. But if you want to take your photography game to the next level and stock up on those precious Upgrade Packs, the Expedition Handbook is your treasure map. It’s a scavenger hunt that turns the entire world into a photo studio, and honestly, who doesn’t love a good treasure hunt?
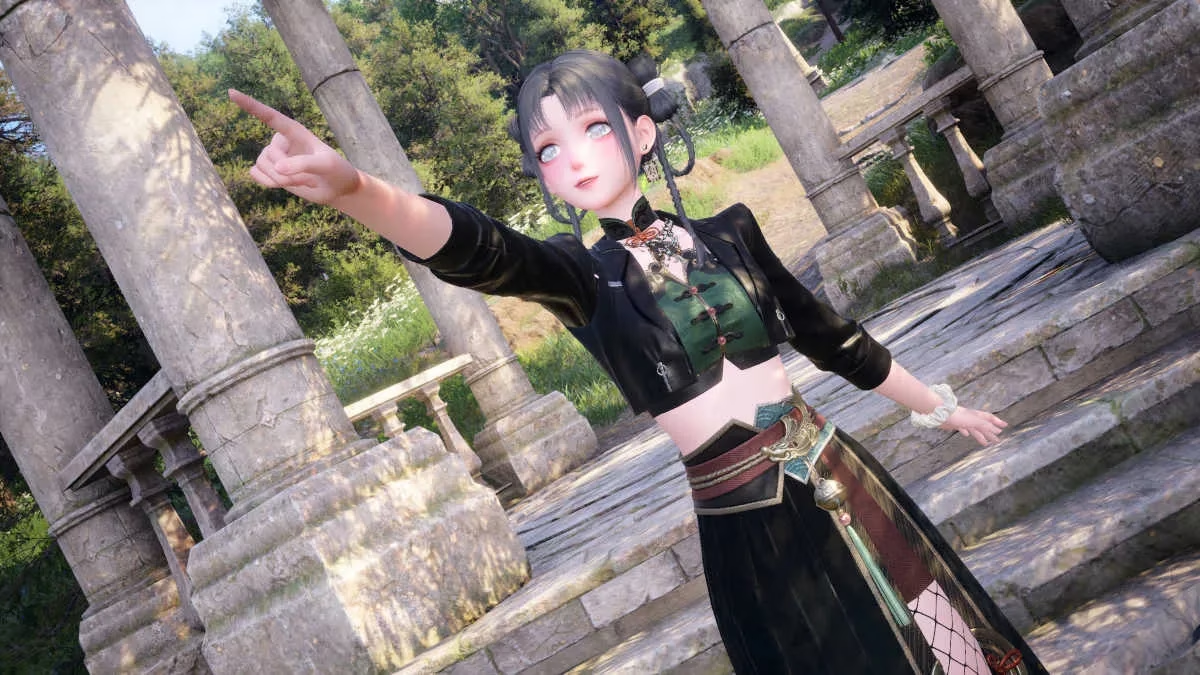
Before you can even crack open the Handbook, you’ll need to get your shutter finger ready. Take a few random photos around the world until a message from the LuminaLens Touring Photographers pops up. Once that happens, open your camera and select the middle icon in the top-right corner. A blank Expedition Handbook will appear, waiting patiently to be filled with 40 unique stamps. Each successful shot rewards three Upgrade Packs – perfect for unlocking those extra lighting styles or adorable poses you’ve been eyeing.
Here’s the thing though: the camera won’t just accept any random picture. When you stumble upon an official photo spot, the active quest on the left side of your screen will update to the name of the image. The spot where you need to stand is tiny, so you might find yourself doing a little shuffle dance until the subject appears inside a golden box in camera mode. Snap the photo, but don’t forget to hit the Upload button on the right side of the preview screen – skip that and your hard work goes poof.
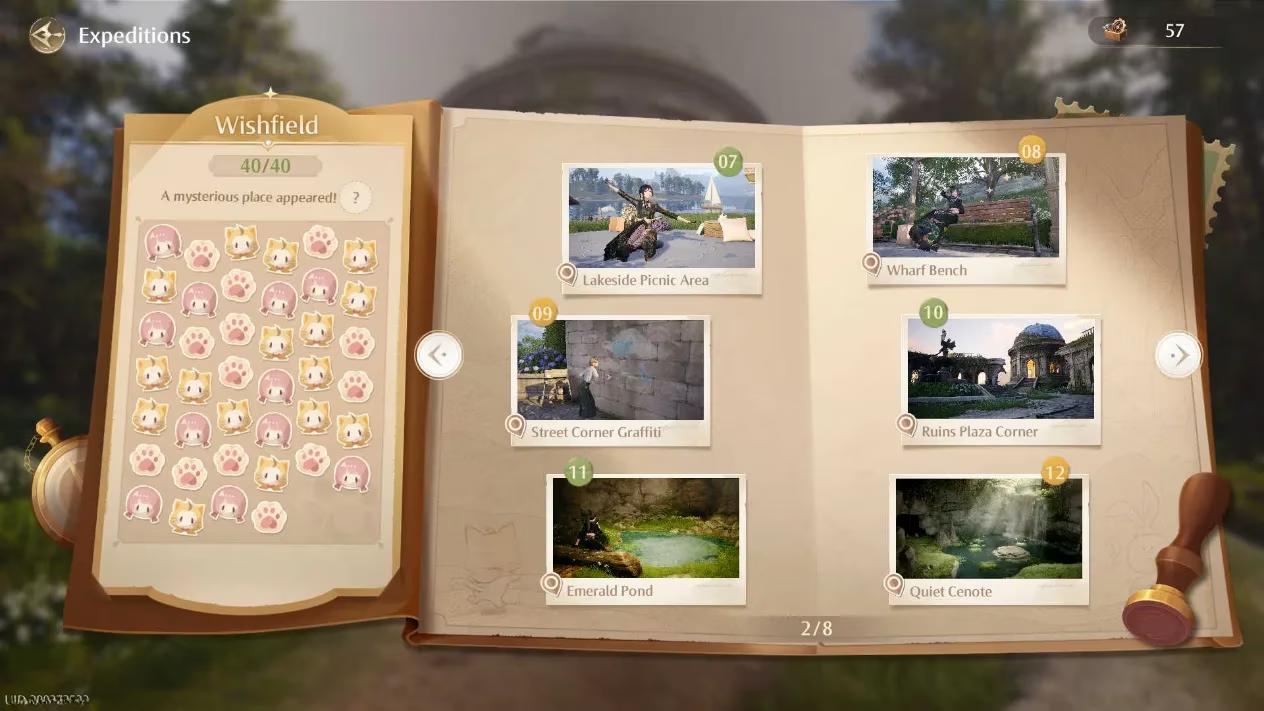
The first 32 photos are scattered across Miraland and can be taken pretty much as soon as you get the Handbook. The remaining eight are locked behind main story progression, with the final ones unlocking in Chapter 6 when you reach the Wishing Woods. It’s a journey, but hey, what’s an adventure without a little patience?
Florawish: 15 Photos of Cozy Charm
Most of your early Handbook work happens here. Florawish oozes storybook vibes, and the photos reflect that. You’ll be capturing everything from the headless statue in the plaza to the flower-lined swing near Elena’s stall. Here are a few highlights to get you started:
-
Florawish Memorial: Stand in the central plaza and frame the headless statue. Easy peasy.
-
Log Bridge: Found along the main path southeast of Memorial Mountains – keep an eye on the right side.
-
Swing: Right next to Elena the flower seller. You don’t even need to sit on it.
-
Statue at Mayor’s Residence: Outside the main doors, any angle works as long as the face is visible.
-
Ray and Wing’s Dessert Counter: After snapping the exterior (another photo in the set), step inside and photograph the yummy pastries on the counter.
Other gems include the graffiti wall, the picnic blankets by the shore, and the little stage inside the Bibcoon Chuckle Club. Nonoy’s house even gives you two stamps – her dressing mirror upstairs and, well, her bedroom (we’re not asking why).
Breezy Meadow: 9 Photos of Wide-Open Beauty
Things spread out a lot here, so prepare for some running – or better yet, hop on your bike. The targets are dreamy, but positioning can be a little finicky. Let’s be real, some of these spots will test your patience.
-
Bug Catcher’s Cabin Windmill: Hop around a bit if the golden box doesn’t show up. As long as the windmill is fully in frame, you’re golden.
-
Blossom Forest Path: The focus seems to be the floor, but play with zoom and focal length to capture more of the surrounding pink petals.
-
Swan Gazebo: East of the cabin, on a circular platform – it’s just as pretty as it sounds.
-
Bullquet Habitat: Head south from the main path toward the Abandoned Fanatic Camp. Trust us, the view here is worth the detour.
The Queen’s Palace Ruins demand a bit of bravery – Esselings swarm the place, but after a fight you can grab two photos: one of the domed buildings and one from the top of the tower. The Art Academy stage and the shimmering pond near the Fishing Association round out the set.

Stoneville: 5 Photos with a Side of Cliff Climbing
Stoneville’s verticality makes for some awkward angles. You’ll be scrambling up cliffs more than once, but the results are worth it.
-
Stonetree: Climb the southern cliff of the lake and angle your camera very carefully. It’s a bit picky, but the reflection on the water is stunning.
-
Lavenfringe Fields from Above: Same deal – get up high and look down. When the quest name changes, you’ll know you’re in the right spot.
-
Village House: The easiest one, just shoot from the main bridge facing east.
-
Lavenfringe Fields (close-up): Hop down from the bridge after the previous shot and you’ll practically land on this one.
-
Village Corner: A little house west of the Warp Spire – snap the front porch.
Abandoned District: 4 Photos That Unlock with Chapter 5
Don’t bother looking for these before Chapter 5; the area stays locked until then. Once you arrive, the Handbook practically hands you the first photo.
-
Golden Fields Windmill: As soon as you set foot on the first island, aim at the windmill. Done.
-
Handsome Lads Circus: You’ll reach the Warp Spire naturally while progressing. The Frolicking Pieceys at the top make for a joyful shot.
-
Market of Mirth: One platform below the Circus, focus on the Pieceys performing on stage.
-
Choo Choo Station: Explored during Chapter 5. Move the camera up for a cleaner view of the station.

Wishing Woods: 5 Photos for the Final Stretch
Unlocked in Chapter 6, these final five feel like a victory lap. Each spot is tied to the main story, so you’ll naturally stumble upon them.
-
Valley Entrance: Face north as soon as you enter the Woods.
-
Wishcraft Lab: A story location you can’t miss.
-
Tranquil Shoal: Stand under the tree near the water’s edge – the map might try to confuse you, but you’ll figure it out.
-
Millewish Tree: After the Shoal shot, head west to a spot north of the Shoal Slope Warp Spire for a gorgeous full-tree view.
-
Timis’s Lab: Looks like something out of a fantasy epic, and you’ll visit it during the main quest.
The Secret 41st Photo (Currently Bugged)
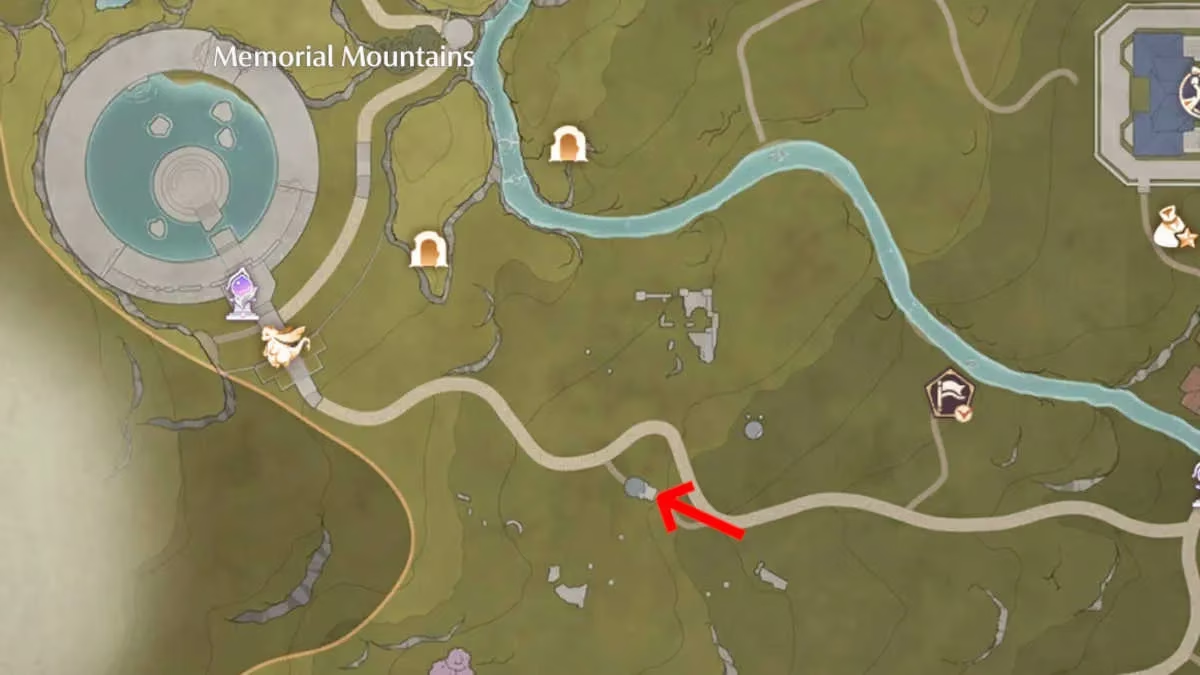
Once all 40 stamps are collected, a secret location unlocks – a lovely gazebo near Memorial Mountains, on a small path you’ve probably already passed a dozen times. As of now, no one has been able to log this photo in the Handbook due to a bug. It’s right there, waiting, but the camera refuses to acknowledge it. When the fix drops, we’ll all breathe a sigh of relief and grab our final stamp. Until then, consider it a little mystery to keep an eye on.
The Expedition Handbook turns everyday exploration into a joyful scavenger hunt. Whether you’re climbing cliffs in Stoneville or dodging Esselings for a ruin shot, every stamp feels like a tiny victory. So grab your camera, embrace your inner tourist, and go fill that book. Miraland is waiting.